
Quick answer: pre-chill the cooler and everything going into it, put block ice or frozen water jugs on the bottom, pack sealed raw meat low and away from ready-to-eat food, fill empty space, and keep drinks in a second cooler. The USDA says cold food must stay at 40°F or below, so pack a small appliance thermometer and check it every day.
A cooler is the refrigerator of most car camping trips, and it does a harder job than the one in your kitchen. A cooler has no compressor, it sits outside in the sun, and it gets opened by every hungry person in camp. How long it holds a safe temperature depends far more on how it is packed than on the brand name on the lid.
The good news is that packing a cooler well is a learnable routine, not a talent. A few habits, such as pre-chilling, choosing the right ice and loading food in the reverse order of when you will eat it, make a cheap cooler perform better than an expensive one packed carelessly.
This guide walks through the full process, from the night before the trip to the last morning at camp. This walkthrough sits inside our larger camping food guide, which covers meal planning, cooking methods and cleanup for the whole trip.
Why Cooler Temperature Matters
Food safety at camp comes down to one number. The U.S. Department of Agriculture’s Food Safety and Inspection Service (FSIS) says perishable food should be held at 40°F or below. Between 40°F and 140°F is what the agency calls the Danger Zone, a range where bacteria can double in as little as 20 minutes.
That speed is why a warm cooler is a real risk and not just an inconvenience. Raw chicken, ground beef, deli meat, cut melon, cooked leftovers, dairy and eggs are all perishable. Should they sit in water that has crept up to 50°F, the problem may not show up as a smell or a slimy texture. Many of the bacteria that cause foodborne illness do not change how food looks.
FSIS also gives a clear time rule. Perishable food that has been out of refrigeration for more than two hours should be thrown away, and that window drops to one hour when the air temperature is above 90°F. Summer camping in hot places, including much of Florida for most of the year, puts you in that one-hour window often. Our guide to Florida camping seasons explains why heat shapes trip planning there.
A Thermometer Beats Guesswork
Most people judge a cooler by touch. Cold water feels cold even when it is well above 40°F, so touch is not a reliable test. A simple appliance thermometer, the kind sold for refrigerators, can sit on top of the food and tell you the truth in seconds. FSIS recommends using one in coolers for exactly this reason. Check it each morning and evening, and add ice as soon as the reading starts climbing toward 40°F.

Get the Cooler Ready Before You Leave
Pre-chilling is the single habit that changes cooler performance the most. A cooler stored in a hot garage or car trunk holds a lot of heat in its walls and lid. When you pour ice into a warm cooler, a large share of that ice melts just bringing the plastic down to temperature.
Bring the cooler indoors the day before and let it cool to room temperature. Then fill it with a sacrificial bag of ice or a few frozen jugs for several hours or overnight. Dump that ice before you pack, and you start the trip with cold walls instead of warm ones.
Chill or Freeze the Food Too
Everything that goes in should already be cold. Room-temperature drinks and groceries pull heat out of your ice the moment they go in. Refrigerate food overnight, and freeze what you can.
Freezing does double duty. Frozen meat for the second or third night acts as extra ice early in the trip and thaws slowly in the cooler, so it is ready to cook later. Soups, chili and marinated meat can be frozen flat in sealed freezer bags, which stack neatly and leak less. Water bottles and gallon jugs frozen at home become ice that turns into drinking water as it melts.
Prep at Home
Every minute the lid stays open lets cold air out, so the less you have to dig and sort at camp, the better. Chop vegetables, mix pancake batter dry ingredients, marinate meat and portion meals at home. Pack each meal in its own labeled bag or container. Remove bulky cardboard packaging, which takes space and gets soggy, and move eggs into a hard plastic egg carrier or crack them into a sealed bottle. These steps also make camp cooking faster, a point covered in our camping breakfast ideas.
Block Ice, Cubes, Jugs or Packs
The type of ice you choose affects how long it lasts. Each option has a place, and many experienced campers combine two of them.
- Block ice melts slowly because it has less surface area exposed to warm air than the same weight of cubes. Blocks make the best base layer for multi-day trips.
- Cubed ice fills gaps between items and chills food quickly, but it melts faster. Use it on top of and around the food.
- Frozen water jugs or bottles work like block ice, keep meltwater contained, and give you drinking water later. They are a clean, simple choice for families.
- Reusable gel or hard ice packs stay sealed, so they never flood the cooler. They usually hold less cold than an equal volume of ice, so they suit short trips or small coolers.
- Dry ice is far colder than water ice and lasts a long time, but it brings real handling risks, covered below.
Ice quantity matters as much as type. Cooler makers often suggest more ice than people expect. YETI, for example, recommends aiming for about twice as much ice as contents by volume for the best ice retention. You will not always manage that ratio on a family trip, but it is a useful reminder that a cooler packed full of food with a thin layer of cubes on top will not last a long weekend.
Dry Ice Cautions
Dry ice is frozen carbon dioxide at about minus 109°F. Direct contact can cause frostbite-like burns, so handle it only with thick gloves or tongs. As it warms, it turns directly into carbon dioxide gas, which can build up in a closed car, tent or camper and displace the oxygen people need. Never seal dry ice in an airtight container, since the pressure can build. Wrap it in newspaper or cardboard, keep it away from direct contact with food you do not want frozen solid, and check the cooler maker’s instructions, because not every cooler is rated for it. Travel with a window cracked, and never keep a dry ice cooler inside a sleeping space.

How to Layer a Cooler
Think of the cooler in layers, from the coldest bottom to the most-used top. Cold air sinks, so the bottom of a cooler stays coldest the longest.
- Start with a base of block ice or frozen jugs across the bottom.
- Add raw meat, poultry and seafood in sealed, leak-proof containers or double bags. FSIS advises keeping raw meat securely wrapped so juices cannot drip onto other food.
- Place frozen meals for later days near the raw meat, so they stay frozen longest.
- Layer dairy, eggs and cooked dishes for the middle of the trip above that.
- Put the first day’s lunch, snacks, condiments and produce near the top.
- Pour cubed ice into the gaps and over the top, then close the lid tightly.
Pack in reverse order of use. Food for the last day goes deepest, food for the first meal goes on top. That way the lid opens briefly, you grab what you need, and the deep layers stay undisturbed. A list taped inside the lid showing what is in each layer saves even more digging.
Fill the Empty Space
Air is the enemy inside a cooler. A full cooler holds its temperature longer than a half-empty one, a point FSIS makes in its guidance on camping food. As you eat through supplies, fill the gaps with more ice, frozen jugs or even a folded towel. A smaller cooler packed full often beats a big cooler packed half full.
Separate Coolers for Drinks and Food
The drinks cooler gets opened constantly. Every can someone grabs lets in warm air, and children open coolers the way adults open refrigerators, just to look. FSIS recommends packing beverages in one cooler and perishable food in another for this reason.
A two-cooler system works well for most groups. The food cooler stays closed except at mealtimes, and one person manages it. The drinks cooler can be cheaper and smaller and can live near the picnic table. With room for a third, a small cooler of ready-to-eat lunch items keeps the main food cooler shut even longer.
On longer trips, some campers dedicate one cooler to frozen food and ice only, opened just once a day to restock the others. That approach takes more space in the car, so it suits trips of four days or more, or summer camping where heat drains ice fast.
Keeping the Cooler Cold at Camp
Location matters once you arrive. Keep the cooler in the shade, out of direct sun, and move it as the shade shifts during the day. FSIS suggests covering it with a blanket, tarp or poncho for extra insulation. Lifting the cooler off hot ground, onto a picnic bench or a couple of pieces of wood, helps a little too.
Open the lid as rarely and briefly as you can. Plan what you need before lifting the lid. Gather it all at once. Close it right away.
To Drain or Not to Drain
Meltwater advice varies. Cold meltwater still chills food, and some cooler makers say it helps the remaining ice last. The trade-off is that food sitting in water gets soggy, labels peel and any leaky package can contaminate the whole cooler. A practical middle ground is to keep food in sealed, waterproof containers or on a cooler basket or rack above the water, and drain only when the water is getting warm or is dirty. Check the thermometer, not the ice level, to decide when food is at risk.
Restocking Ice
Most campgrounds have a camp store or a town nearby that sells ice. Plan a restock run every day or two in warm weather. Add new ice to the top and sides, and drain warm water first so the new ice is not wasted cooling it. If the temperature reading has gone above 40°F for more than two hours, the FSIS rules say perishable food in the cooler should be discarded, even if it looks fine.
Coolers, Wildlife and Campground Rules
A cooler full of food is a strong attractant for animals, from raccoons and jays to bears. Most coolers are not bear-resistant. Some models are certified by the Interagency Grizzly Bear Committee, but only when they are closed with padlocks or bolts as the certification requires.
In bear country, the National Park Service and many parks require food and coolers to be stored in a bear box or a hard-sided vehicle with the windows closed whenever they are not in active use. Never leave a cooler out overnight or while you hike. Even outside bear country, a raccoon can open a cooler latch, and an unattended cooler on a picnic table is an open invitation. Our campsite safety basics covers wildlife and food storage in more detail.
Cleaning the Cooler at Home
Clean the cooler as soon as you get home. Wash it with warm soapy water, rinse it and let it dry fully with the lid open, which prevents mildew and odors. Where raw meat juices leaked, FSIS advice for kitchens applies: clean first, then sanitize the surfaces. Store the cooler with the lid propped open slightly so air can move through it.

Choosing Cooking Methods That Match the Cooler
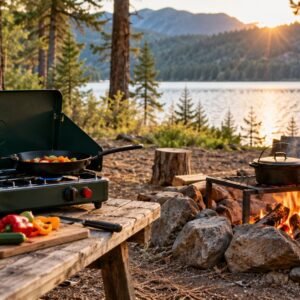
How you pack also affects how you cook. Raw meat stored at the bottom needs to come out at mealtime and go straight onto a hot surface, so you want a cooking setup ready before the cooler opens. A stove gives quick, steady heat for meat that needs to reach a safe internal temperature, while a campfire suits foods that tolerate slower cooking. Our comparison of camp stove vs campfire cooking explains which to use when.
Cook to safe internal temperatures and check with a food thermometer. FSIS lists 165°F for poultry, 160°F for ground beef and pork, and 145°F with a three-minute rest for whole cuts of beef, pork, veal and lamb. Fish should reach 145°F. Leftovers should go back into the cooler within two hours, or one hour in heat above 90°F.
Plan meals so the most perishable food is eaten first. Fresh fish and ground meat suit the first night. Cured sausage, hard cheese, canned chicken and shelf-stable foods suit the last day, when the cooler is working hardest. A simple plan like that takes pressure off the ice and makes the end of the trip safer.
Frequently Asked Questions
How long will food stay safe in a camping cooler?
It depends on the cooler, the ice and the weather, so the honest answer is to measure. Keep an appliance thermometer inside and treat 40°F as the limit the USDA sets. Many well-packed coolers hold that temperature for two to four days with restocking, but heat and frequent opening shorten that time.
Should raw meat go on the top or bottom of the cooler?
Put raw meat on the bottom, in sealed containers or double bags, so juices cannot drip onto ready-to-eat food. The bottom is also the coldest part of the cooler.
Is block ice better than cubed ice?
Block ice lasts longer because it has less exposed surface area. Cubes chill food faster and fill gaps. Many campers use blocks or frozen jugs on the bottom and cubes on top.
Can I keep my cooler in the car?
In bear country, a hard-sided vehicle with closed windows is often the required storage place when the cooler is not in use. Cars get hot in sun, though, so park in shade when you can and check the thermometer more often.
What should I throw away if the ice melts?
If perishable food has been above 40°F for more than two hours, or one hour above 90°F, FSIS says to throw it out. Hard cheese, whole fruit and vegetables and sealed shelf-stable items are less risky, but raw meat, dairy and cooked leftovers should go.
Leave a Reply