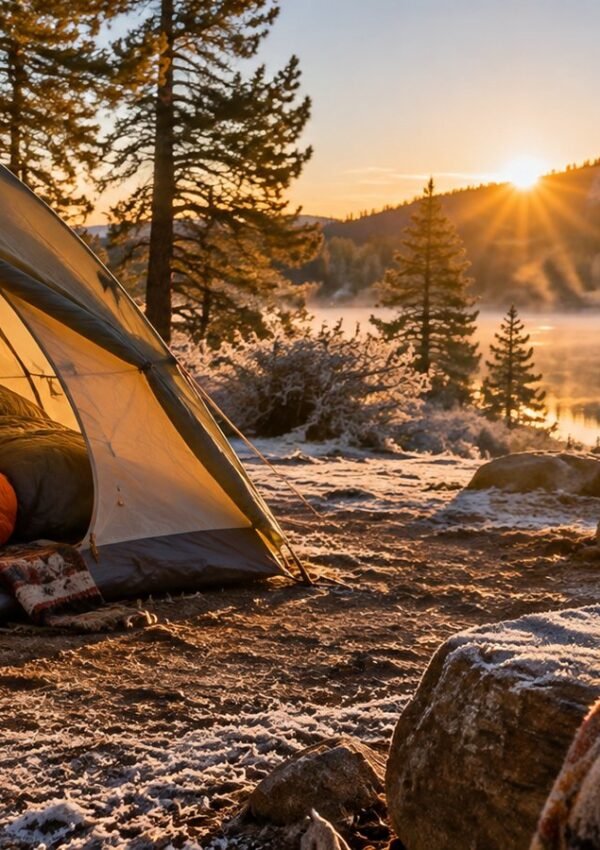
Quick answer: for a first camping trip, choose car camping at a developed campground within about two hours of home, ideally for one or two nights. Book a site early through the park’s reservation system or Recreation.gov, check the forecast and campground rules, and gather the core gear: a tent you have practiced pitching, a sleeping bag and pad suited to overnight lows, a light source, a simple kitchen and layers for cool nights. Plan easy meals, pack the car in the order you will unpack it, arrive with plenty of daylight to set up and follow Leave No Trace principles. Keep the first trip short and simple, then build from there.
A first camping trip can feel like a lot to organize. There is gear to gather, a campsite to book, meals to plan and a long list of what-ifs. The good news is that most of the stress disappears with a simple plan and realistic expectations.
This step-by-step guide walks through planning a first trip from start to finish. For the full gear list by trip type, keep our complete camping checklist open as you plan.
Sources: Recreation.gov reservation information for federal campgrounds; National Park Service (NPS) camping and trip planning pages; state park reservation systems; Leave No Trace Center for Outdoor Ethics seven principles; National Weather Service forecasts and safety guidance; USDA Food Safety and Inspection Service cooler and food safety guidance; U.S. Forest Service campground information. Checked October 2026.
Step 1: Choose the Type of Camping
Camping comes in several styles. For a first trip, the simplest option is usually best.
| Type | What it is | Good for beginners? |
|---|---|---|
| Car camping at a developed campground | Park next to your site, with restrooms and water nearby | Yes, the easiest start |
| Cabin or yurt camping | Rustic shelter at a campground | Yes, if you want a roof overhead |
| RV or trailer camping | Sleep in a rented or owned RV | Yes, but requires driving and hookups knowledge |
| Dispersed camping | Free camping on public land without facilities | Better after some experience |
| Backpacking | Hike in and carry everything | Better after car camping trips |
Car camping lets you bring extra comfort items and retreat to the car if the weather turns. You can learn the basics of setting up camp, cooking and sleeping outdoors without worrying about weight.
Step 2: Pick a Campground Close to Home
Choose a campground within about one to two hours of home. A short drive means less fatigue, more daylight at camp and an easy exit if something goes wrong.
What to look for
- Restrooms with flush toilets, or at least vault toilets
- Drinking water taps
- Picnic tables and fire rings at each site
- Showers, if that matters to you
- A campground host on site
- Short, easy hiking trails or a lake nearby
State parks and national forest campgrounds are often good choices. Read the campground’s website for site types, amenities and rules.
Choosing a site
Many reservation systems show site photos and details. For a first trip, look for a level site with shade, some distance from restrooms (close enough to walk, but not right next to them) and away from busy roads. If you have a large tent, check that the tent pad is big enough.
Step 3: Book Your Site
Popular campgrounds fill quickly, especially on summer weekends and holidays.
- Federal campgrounds in national parks and national forests are often booked through Recreation.gov, many on a rolling reservation window that opens months in advance.
- State parks use their own reservation systems with their own booking windows.
- Some campgrounds keep first-come, first-served sites.
Our guide on how to book hard-to-get campsites explains booking windows and cancellation strategies. State parks may also charge a day-use or vehicle entry fee on top of the campsite fee, so check the total cost when booking.
Timing tips
- Midweek trips are easier to book and quieter.
- Late spring and early fall offer milder weather and fewer crowds in many regions.
- Avoid holiday weekends for a first trip if you can.
Step 4: Check Weather and Rules
Weather
Check the National Weather Service forecast for the campground’s location, not just the nearest city, since elevation and terrain can change conditions. Look at overnight lows, rain, wind and thunderstorm risk. If storms or extreme heat or cold are forecast, consider rescheduling.
Campground rules
Read the rules before you go:
- Check-in and check-out times
- Quiet hours
- Campfire rules and current fire restrictions
- Firewood rules; many parks ask you to buy wood locally to avoid spreading invasive pests
- Pet rules
- Food storage requirements in bear country
- Maximum number of people, tents and vehicles per site
Step 5: Gather Your Gear
You do not need to buy everything at once. Borrow from friends, rent from an outfitter or buy only the essentials for a first trip.
Shelter and sleep
- Tent with stakes, poles and rain fly
- Ground cloth or footprint
- Sleeping bag rated for expected overnight lows
- Sleeping pad or air mattress
- Pillow
Pitch your tent in the backyard or living room before the trip. Learning to set it up at home is far easier than in the dark or rain.
Camp kitchen
- Stove and fuel, plus a lighter
- Pot, pan, plates, cups and utensils
- Cooler with ice or ice packs
- Water jugs
- Dish soap, sponge and a small wash basin
- Trash bags
Clothing
- Layers for cool nights, including a warm jacket and hat
- Rain jacket
- Sturdy shoes and camp shoes
- Extra socks
Camp comfort and safety
- Headlamp or flashlight for each person
- Lantern
- Camp chairs
- First aid kit
- Sunscreen and insect repellent
- Map of the area
Our list of the ten essentials for camping covers the safety items worth bringing on every trip.
Step 6: Plan Simple Meals
Keep meals simple on a first trip. Choose foods that are easy to cook, need little cleanup and travel well.
Easy meal ideas
- Breakfast: oatmeal, yogurt and granola, or eggs and toast
- Lunch: sandwiches, wraps, fruit and snacks
- Dinner: foil packet meals, pasta, tacos or hot dogs
- Snacks: trail mix, crackers, cheese and fruit
Prep at home: chop vegetables, marinate meat and pre-measure ingredients into labeled bags. Our guide to food to bring camping for beginners has more ideas.
Food safety
USDA food safety guidance recommends keeping cold food at 40°F or below. Pack the cooler with plenty of ice, keep raw meat in sealed containers at the bottom and keep the cooler in the shade. Bring a thermometer if you are cooking meat.
Step 7: Pack the Car
Load your car in the order you will need things at camp. The tent and site setup gear should come out first, while the cooler and kitchen gear should be easy to reach. Keep a small bag with headlamps, rain jackets and snacks close at hand.
Our guide on how to pack a car for camping explains a simple loading order.
Step 8: Arrive Early and Set Up Camp
Plan to arrive with at least two to three hours of daylight left. Setting up in the dark is harder and more stressful.
Setup order
- Check in with the campground host or office, if required.
- Walk the site and choose a flat, high spot for the tent, away from dead branches overhead.
- Pitch the tent and add the rain fly, even if the sky looks clear.
- Set up sleeping bags and pads inside the tent.
- Set up the kitchen area on the picnic table, away from the tent.
- Organize lights, chairs and a trash bag.
Camp etiquette
Keep noise down during quiet hours, stay within your site, keep pets leashed and leave the site clean. Say hello to neighbors and the host; most campers are happy to help a beginner with a stubborn tent pole or a forgotten lighter.

Step 9: Stay Safe
Fire safety
Use existing fire rings, keep fires small, never leave them unattended and drown them with water until cold before bed or leaving. Check for burn bans before lighting any fire.
Wildlife
Store food, trash and scented items in a locked car or bear box, depending on campground rules. Never feed wildlife.
Weather
If thunderstorms approach, follow National Weather Service advice and shelter in a hard-topped vehicle or building. A tent does not protect you from lightning.
Health
Drink plenty of water, wear sun protection and check for ticks after time in grass or brush.
Step 10: Leave No Trace
The Leave No Trace Center for Outdoor Ethics lists seven principles:
- Plan ahead and prepare.
- Travel and camp on durable surfaces.
- Dispose of waste properly.
- Leave what you find.
- Minimize campfire impacts.
- Respect wildlife.
- Be considerate of other visitors.
Before you leave, walk the site and pick up every scrap of trash, including small items like twist ties and bottle caps.

First Trips With Kids or Dogs
With kids
Children often love camping, especially when the plan includes play time rather than long hikes. A few tips help:
- Choose a campground with a playground, beach or easy nature trail.
- Bring familiar bedtime items such as a favorite blanket or stuffed animal.
- Give each child a headlamp and a small job, like collecting kindling or setting the table.
- Pack extra clothes, since kids get wet and muddy.
- Keep a close eye on children near fires, water and roads.
With dogs
Check that pets are allowed at the campground and on its trails, and bring a leash, water bowl, food, waste bags and a towel. Many parks require leashes at all times. Our guide to a first camping trip with dogs covers gear and campground rules for pets.

Keeping Costs Down
A first trip does not need to be expensive. Borrowing gear, renting from an outfitter or buying a basic starter tent and sleeping bag keeps costs low until you know you enjoy camping. Cook your own meals instead of eating out, and choose a campground close to home to save on fuel. Weeknight stays and off-season dates often come with lower fees as well.

A Sample First-Trip Timeline
| When | Task |
|---|---|
| 4 to 6 months before | Choose a campground and book a site if reservations open early |
| 2 to 4 weeks before | Borrow, rent or buy gear; practice pitching the tent |
| 1 week before | Plan meals, write a packing list and check campground rules |
| 2 to 3 days before | Check the forecast; shop for food |
| Day before | Pack the car, freeze water bottles for the cooler, charge headlamps |
| Day of | Leave early, arrive with daylight to set up |
| After the trip | Dry the tent, clean gear and note what to change next time |

After the Trip
When you get home, set up or hang the tent to dry completely, clean the cooler and stove and restock the first aid kit. Write down what worked, what you forgot and what you did not use. Those notes make the next trip easier.

First Camping Trip Summary
Start with car camping at a developed campground within about two hours of home for one or two nights. Book early, check the forecast and campground rules, and gather core gear, practicing tent setup at home first. Plan simple meals with good cooler food safety, pack the car in the order you will unpack, and arrive with daylight to set up. Follow fire, wildlife and weather safety basics and the seven Leave No Trace principles. Keep the first trip simple, take notes, and build up to longer or more remote trips as your skills grow.
Frequently Asked Questions
Where should I go for my first camping trip?
A developed campground at a state park or national forest within about two hours of home is ideal. Look for restrooms, drinking water, fire rings and a campground host.
How long should my first camping trip be?
One or two nights is a good start. It is long enough to learn the basics without needing lots of food or gear.
What is the most important gear for a first camping trip?
A tent you have practiced pitching, a sleeping bag and pad suited to the overnight low, headlamps, a simple cooking setup and warm layers.
How early should I book a campsite?
Popular campgrounds can fill months in advance, especially for summer weekends. Check the reservation window for your chosen park and book as soon as it opens.
What if it rains on my first camping trip?
Pitch the tent with the rain fly, bring rain jackets and a tarp for the kitchen area, and have a backup plan to leave if storms are severe.