
You may have to sacrifice flush toilets, daily showers, sleeping in a bed, or your access to wifi, but you should never, ever have to forgo your morning cup of joe. That’s why how to make a cup of coffee while camping is always a great thing to learn.
Whether you’re pitching a tent in a primitive campsite on the outskirts of town or glamping with a group of friends at a nearby park, before you unplug and pack Mr. Coffee, you should know that there are several other convenient coffee brewing options to keep you highly caffeinated and waking up motivated on your next outdoor adventure. Let’s look at different ways on how to make coffee while camping!
Percolator
More than likely, if you’re rummaging through old camping supplies in your parent’s basement, you’ll find a perfectly operable bright-blue enamel percolator that has withstood the test of time.
Coffee percolators have been around for hundreds of years and continue to be a fan-favorite in the outdoor community. Why? Because this old-fashioned brew method not only gets you retro camp-vibe kudos but also offers a simple, non-electric method to getting a hearty cup of coffee in the wild while enjoying your camping breakfast.
Percolators are pretty straightforward – they work by cycling boiling water through coffee grounds. As the water boils, it percolates (hence the name) through a tube that runs up into a metal basket filled with your favorite coffee grounds.
Best For
Car-camping, tent camping, or camping on a budget. Best for brewing coffee for larger groups, that only have access to a campfire or camp stove. Also ideal for campers looking to pay tribute to their coffee-loving ancestors.
Difficulty
Overall, percolators are easy to pack, carry, and clean. However, controlling the heat source and perfecting boil time can make this brewing method more challenging than alternative techniques.
What you’ll need
- Percolator
- Heat source (i.e. camp stove, grill, or campfire)
- Coffee grounds
- Water
- Coffee Mug
Method
Brewing the perfect cup of joe using a percolator will take some patience and practice. One of the main reasons percolators have fallen out of style is the bitter, dry flavors they can produce if coffee is overcooked. The basic method for using a percolator as a way on how to make coffee while camping is as follows:
- Fill the percolator with water to the designated ‘fill line’
- Add coffee to the basket, using a filter if applicable
- Close the basket lid
- Place the tube and basket into the pot
- Place the pot over a heat source
- Once the water is boiling, reduce the heat source (move to the edge of a fire or lower heat on a stove)
- Allow coffee to percolate for 5-10 minutes, depending on preference
- Remove the percolator from the heat source
- Enjoy!
AeroPress
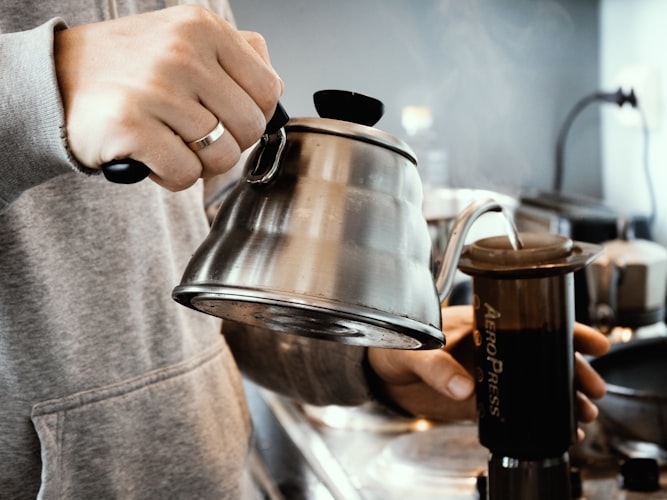
The hippest coffee brewing trend to hit the market as of late, the AeroPress is a compact, easy-to-use coffee maker that creates an exceptionally smooth and diverse cup of coffee. In fact, this is one of the easiest ways on how to make coffee while camping.
Because coffee grounds are wholly immersed in hot water, the extraction process is extraordinarily fast, which results in less acidity and bitterness. Not to mention, Aero Press’s claim to fame is that it is a totally customizable cup of joe on the go.
Difficulty
Easy to pack, store, and clean. However, the brewing process can be as easy or complicated as you want to make it.
What you’ll need
- AeroPress
- AeroPress Micro-Filter
- Water
- Heat Source (i.e., stove, grill, campfire)
- Coffee grounds
- Coffee mug
Method
Using an AeroPress could be considered more of an artform than a coffee brewing process. There are a variety of recipes and best-practices available if you’re looking for the perfect, personalized blend. However, AeroPress recommends the standard method for beginners:
- Place a micro-filter inside the cap and tighten
- Place the AeroPress chamber on top of your coffee mug
- Put coffee grounds into the chamber
- Slowly pour hot water into the chamber
- Stir the coffee and water together for approximately 10 seconds
- Wet the rubber seal and insert the plunger into the chamber
- Plunge the contents into your mug
French Press

If the AeroPress had a larger, swankier older brother, it would be the French Press. Because it doesn’t need much modification to be equipped for the outdoors, French Press is considered one of various ways on how to make coffee while camping.
A cylindrical container is equipped with a plunger and has a built-in filter screen that presses hot water through coarsely ground coffee. It’s as simple as that.
Fortunately, reputable outdoor brands, like GSI Outdoors, have outfitted the beloved French Press that we all know and love, with a rugged, durable wilderness makeover so you never have to leave home without your favorite blend.
If that wasn’t enough, companies like Jetboil, Biolite, and MSR upped the ante by developing French Press Plunger attachments that can be connected to their versatile, lightweight backcountry cook systems, so you can literally make coffee anytime, anywhere.
Best For
Backpackers, campers, or adventurers that are traveling into the backcountry with a lightweight cook system, camping with larger groups, or simply cannot live without a French Press.
Difficulty
Easy to pack, store, and clean. The brewing process is also straightforward and simple to use, even for beginner coffee enthusiasts.
What you’ll need
- French Press or French Press Attachment
- Coarsely ground coffee
- Heat source (i.e. camp stove, grill, or campfire)
- Water
- Coffee Mug or cup
Method
Although some variations to the brewing process do exist, the French Press generally looks a lot more complicated than it actually is. Following a few simple steps, you can enjoy one of the most flavorful, robust cups of coffee you’ve ever had.
- Add your favorite coffee blend to the bottom of the French Press or specialized cook system.
- Pour hot water over the coffee grounds and gently stir.
- Insert the plunger, but do not plunge.
- After allowing the coffee to steep for 3-4 minutes, slowly press the plunger downward.
- Pour and enjoy!
Single-Serve Pour Over
There are two types of coffee drinkers in the world: The everyday coffee devotee and the “I refuse to drink anything but pour over.” If you’re the latter, you’re in luck. You’ll find it much easier when it comes to how to make coffee while camping using single-serve pour over method.
A new trend is hitting the trails, and it aims to solve the ever-present problem of how to conveniently bring premium pour-over into the wild. In the last few years, companies like Kuju Coffee, have created single-serve pour over premium coffee packets to a community of outdoor hopefuls with the goal of putting the kibosh to instant coffee in the backcountry.
Proving that it doesn’t have to be complicated, to be delicious, this single-serving pour over alternative marries the convenience of instant coffee with a superior quality coffee brewing method.
Best For: Campers, hikers, and backpackers that just can’t live without pour over and aren’t interested in sharing. Solo-adventurers or anyone that is willing to pay a little extra to enjoy premium coffee, on the go.
Difficulty
Easy to pack, carry, and clean.
What you’ll need
- A supply of single-serve pour over packets
- Coffee Mug
- Heat source (i.e. camp stove, grill, or campfire)
- Water
Method
Instructions may vary based on the coffee brand, but generally speaking, secure the pour over anchors to the side of your mug, pour hot water over the included coffee grounds, and let the contents drip into your mug.
Cowboy Coffee
If you’re heading outdoors in search of a good old-fashioned, primitive camping experience, why not make your coffee the way they did in the wild west? Cowboy Coffee has a long-standing reputation as being the most authentic camp coffee around – so much so, that the name alone evokes a sense of adventure.
Nowadays, enjoying a cup of cowboy coffee doesn’t mean you have to throw a tinned iron, blackened pot over a bed of hot coals or wrangle up rowdy cattle – although you can if you want to. Making cowboy coffee is as simple adding coffee to boiling water over a stove, making it one of the easiest ways on how to make coffee while camping.
Cowboy Coffee’s claim to fame is definitely in its simplicity and, if brewed correctly, its vigorous flavors. Not to mention, if there’s more than one coffee-obsessed traveler in your group, cowboy coffee can be made in large batches and shared.
Best For: Backpackers looking to minimize pack weight. Campers, hikers, or backpackers in larger groups that aren’t interested in overcomplicating the coffee-making process. Cowboy enthusiasts.
Difficulty
One of the easiest methods of brewing coffee, overall. Minimal cleanup and little to no preparation is needed.
What you’ll need:
- Coffee Grounds
- Water
- Heat source (i.e. camp stove, grill, or campfire)
- A Pot
Method
Despite its humble beginnings, there are a number of unique ways to make Cowboy Coffee. For the sake of our ancestors, we’ll keep things simple by providing the easiest, more traditional method.
- Add water to a pot
- Place the pot on the campfire or a stove
- When the water comes to a boil, remove it from the heat source
- Add coffee grounds
- Thoroughly stir the coffee grounds
- Allow the pot to sit and grounds to steep for 2-3 minutes
- Add a small amount of cold water
- Carefully pour the coffee into your cup
Cold Brew and/or Cold Brew Concentrate

You can eliminate the need to boil water, grind coffee beans, buy a coffee maker, or employ special strategies to feed your coffee cravings. It’s as easy as waking up, walking to the cooler, and grabbing a prepackaged, perfectly prepared cold brew or some cold brew concentrate.
Perfect for hot summer days or for a midday pick-me-up after a long trek in the mountains, cold brew and cold brew concentrate allow for a completely customizable, refreshing dose of coffee without the antics of hot coffee equivalents.
Cold Brew is more than your favorite blend on ice, it’s coffee that is brewed at room temperature or in cold water for over 12 to 24 hours, which allows it to retain its punchy, bold flavor.
Best For: Campers, hikers, or bikers with access to a cooler.
Difficulty
Little to no effort is required in packing and storing cold brew or cold brew concentrate and there is no cleanup required – simply throw away the bottle when you’re done.
What you’ll need
- Cold Brew Concentrate
- A cup
- Ice
- Water
Method
There are a number of cold brew options on the market that can be purchased as-is and to your liking. However, when buying cold brew concentrate, it’s recommended that you dilute the brew with equal amounts of water, in addition to your favorite milk or creamer.
Instant Coffee
Just as the name implies, instant coffee is for anyone that is looking that immediate satisfaction of a warm, delicious cup of coffee, without the frills of brewing a fresh pot.
With a growing number of reputable coffee brands jumping on the instant-coffee-wagon, the days of instant coffee being a last-ditch resort are quickly coming to an end.
Instant coffee is arguably the most lightweight, packable, easy-to-use option on this list. So, if you’re the kind of camper, backpacker, or adventurer that’s willing to sacrifice a tiny bit of quality for a ton of convenience, instant coffee is for you.
Best For
Backpackers, hikers, and campers that are no-frills coffee drinkers.
Difficulty
Easy to pack, super lightweight, and minimal cleaning required. It doesn’t get much easier than pour, stir and enjoy, which is precisely what you can expect from instant coffee.
What you’ll need
- Instant Coffee Blend
- Heat source (i.e. camp stove, grill, or campfire)
- A cup
- Water
Method
If you’re drinking instant coffee, it’s because you like to keep things simple so let’s not overcomplicate things – just pour the contents into your cup, add hot water, and stir!
OXX CoffeeBoxx
The name alone should tell you that this coffee maker means business. You might catch some flack from your outdoorsy friends for bringing an industrial-grade single-cup coffee maker to the mountains, but that probably won’t stop them from lining up to test out this crush-proof coffee anomaly.
Boasting a reputation as “The World’s Toughest Coffee Maker,” the Oxx CoffeeBoxx is a little over-the-top for hiking into the backcountry, but it was designed to sustain the elements and can take a serious beating.
For that reason, if you plan to spend a lot of time in rugged terrain, in an RV, car camping, or using a camper, the Oxx CoffeeBoxx is worth a look.
Best For: Long-term camping situations, camping in a hard-sided vehicle, or outdoor workplace environments (i.e., construction jobs). Weekend tailgating.
Difficulty
The coffee maker itself is easy to use, but packing, storing, and finding an outlet may be more challenging.
What you’ll need
- Oxx CoffeeBoxx
- K-cups
- Water
- 120-volt power outlet
- Coffee Cup
Method
Operating the Oxx CoffeeBoxx is as simple as plugging in the machine, turning it on, adding a single-service k-cup to the holder, and hitting a button to brew a fresh cup of coffee.
Conclusion
Whether you try one method, or try them all, you really can’t go wrong with brewing a fresh blend of coffee in the wild. Whether you’re heading into the backcountry or hanging by the campfire with friends, remember that the only thing worse than poorly made coffee, is no coffee it all! Just learn how to make coffee while camping, at least one method to make your camping time better.
This article was originally posted on Little Coffee Place (edited).

Leave a Reply